
The Ultimate Guide to Wiring a 7-Pin Trailer Connector
If you're new to towing or need to replace a worn-out connector, wiring a 7-pin trailer plug can feel like a challenging task. However, with the right tools, clear instructions, and a little patience, you can tackle...
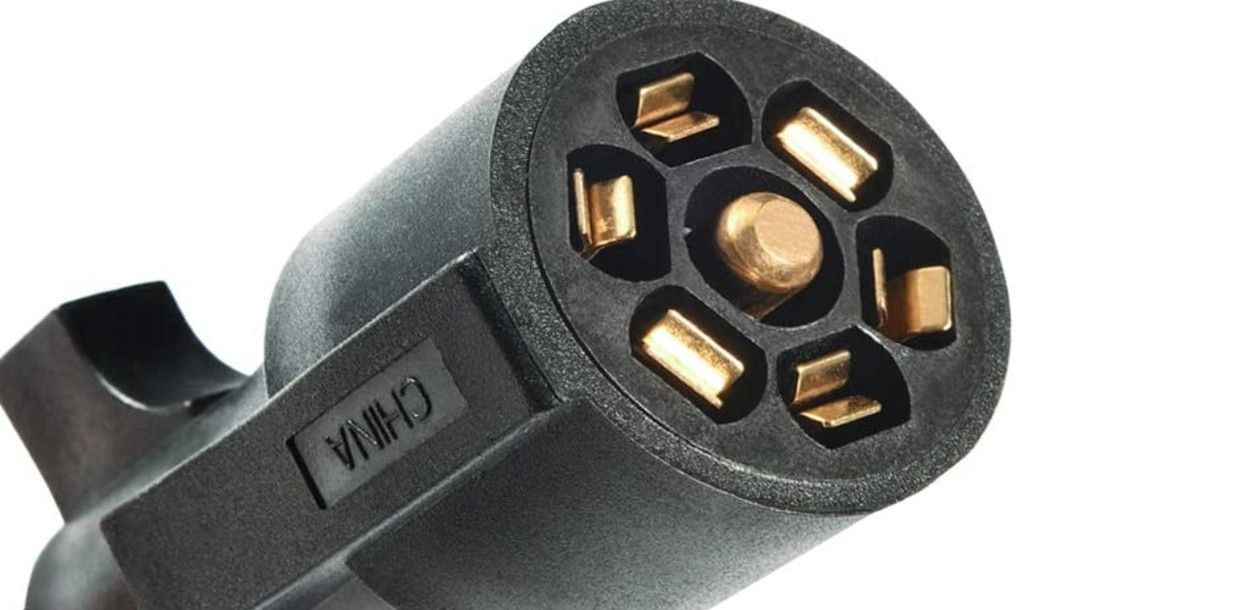
A 7-pin trailer plug has seven wires: white (ground), blue (electric brakes), brown (tail/running lights), yellow (left turn/brake), green (right turn/brake), purple (backup lights), and black (12V power for accessories). Strip about 1/2 inch of insulation from each wire, connect each to its corresponding pin, and seal connections with heat shrink tubing or electrical tape. Always test all lights, brakes, and backup lights with a multimeter before driving.
If you're new to towing or need to replace a worn-out connector, wiring a 7-pin trailer plug can feel like a challenging task. However, with the right tools, clear instructions, and a little patience, you can tackle this job with ease. A 7-way trailer plug wiring diagram is essential when wiring your trailer plug, as it ensures that all the functions—such as lights, brakes, and 12V power—are properly connected. This guide will walk you through how to wire a 7-way trailer plug safely, ensuring you’re ready for a smooth towing experience.
1. Gather Your Tools and Materials
Before starting, make sure you have the following items:
- 7-pin trailer connector kit
- Wire strippers
- Heat shrink tubing or electrical tape
- Wire cutters
- Screwdriver or socket set
- Multimeter (optional but helpful for testing connections)
2. Understand the 7-Way Trailer Plug Diagram
A 7-pin trailer plug consists of seven pins, each responsible for a specific function. Here’s a breakdown of what each pin controls:
- Pin 1: Ground (White wire) – This is the grounding connection.
- Pin 2: Electric Brakes (Blue wire) – Powers the trailer’s electric brakes.
- Pin 3: Tail/Running Lights (Brown wire) – Powers the tail and running lights of the trailer.
- Pin 4: Left Turn/Brake Lights (Yellow wire) – Controls the left turn signal and left brake light.
- Pin 5: Right Turn/Brake Lights (Green wire) – Controls the right turn signal and right brake light.
- Pin 6: Backup Lights (Purple wire) – Powers the trailer’s reverse lights.
- Pin 7: 12V Power (Black wire) – Supplies 12V power for any trailer accessories, such as interior lights or a winch.
Be sure to refer to the 7-way trailer plug diagram that comes with your specific connector, as wire colors can sometimes vary.

3. Prepare the Wires for Connection
Before attaching the wires to the pins, you’ll need to strip the insulation off the wire ends. Remove approximately 1/2 inch of insulation to expose the copper wiring. Twist the exposed wires to prevent any fraying.
4. Connect the Wires to the Pins
Follow these steps to wire the connector to your trailer:
- Pin 1 (Ground - White wire): Connect to the largest pin. This wire establishes the ground connection.
- Pin 2 (Electric Brakes - Blue wire): Connect this wire to the electric brake system.
- Pin 3 (Tail/Running Lights - Brown wire): Connect to the trailer’s running and tail lights.
- Pin 4 (Left Turn/Brake Lights - Yellow wire): This controls the left turn signal and brake lights.
- Pin 5 (Right Turn/Brake Lights - Green wire): This wire controls the right turn signal and brake lights.
- Pin 6 (Backup Lights - Purple wire): Connect this to the trailer’s backup lights.
- Pin 7 (12V Power - Black wire): This provides 12V power to the trailer for accessories.
5. Secure Your Connections
After you have connected each wire, use heat shrink tubing or electrical tape to secure the connections. This will protect the wires and prevent them from becoming loose or short-circuiting.
6. Test the Trailer Wiring Connection
Before taking your trailer on the road, you must test the connections. Use a multimeter to check for continuity and ensure that each pin is working as intended. Test the trailer lights, including brake lights, turn signals, and running lights. Additionally, check the backup lights and electric brakes to make sure everything is functioning properly.
7. Install the Connector
Once you’ve confirmed all the wiring works, mount the 7-pin trailer plug to your vehicle using screws or bolts. Ensure it is securely fastened to avoid any issues while towing.
Conclusion
Wiring a 7-pin trailer plug is a straightforward process once you understand the wiring diagram and gather the right tools. Whether you're hauling a camper, boat, or utility trailer, ensuring your trailer connector is wired correctly is essential for a safe towing experience. Always double-check your wiring and connections, and if you're unsure about any part of the process, consult a professional for assistance.
By following the steps above and referencing the 7-pin trailer wiring diagram, you can confidently handle this task and ensure a safe and reliable connection for your trailer.
Frequently Asked Questions
What color wire goes to each pin on a 7-pin trailer plug?
Which pin on a 7-way trailer connector controls the electric brakes?
What tools do I need to wire a 7-pin trailer plug?
How do I test a 7-pin trailer plug after wiring it?
What does the black wire on a 7-pin trailer plug do?
Ready to haul?
Find the right trailer near you — or list yours and start earning.